Connect your email, with pictures
Step 3 of setup, one click at a time. Allow about 10 minutes. You only do this once.
What you're setting up
Make.com is a free service that connects apps together. We've built a ready-made Make.com "scenario" (their word for a small automation) that does one thing: when you press Request Customer Feedback, it sends the email from your Gmail or Outlook.
You'll copy our scenario into your own free Make.com account, connect your email, and paste one address back into Rapid Feedback.
Before you start
Open your Rapid Feedback setup page (Step 3 of 3: Connect your email) in one browser tab, and use a second tab for Make.com.
Pick your email:
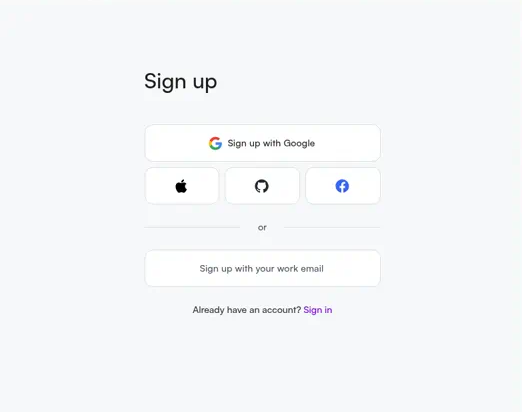
1. Create or sign in to your Make.com account. Go to Make.com and sign up (or sign in). New accounts are asked a few onboarding questions. Choose anything; none of them affect Rapid Feedback. Then confirm your email by clicking the link Make.com sends you.
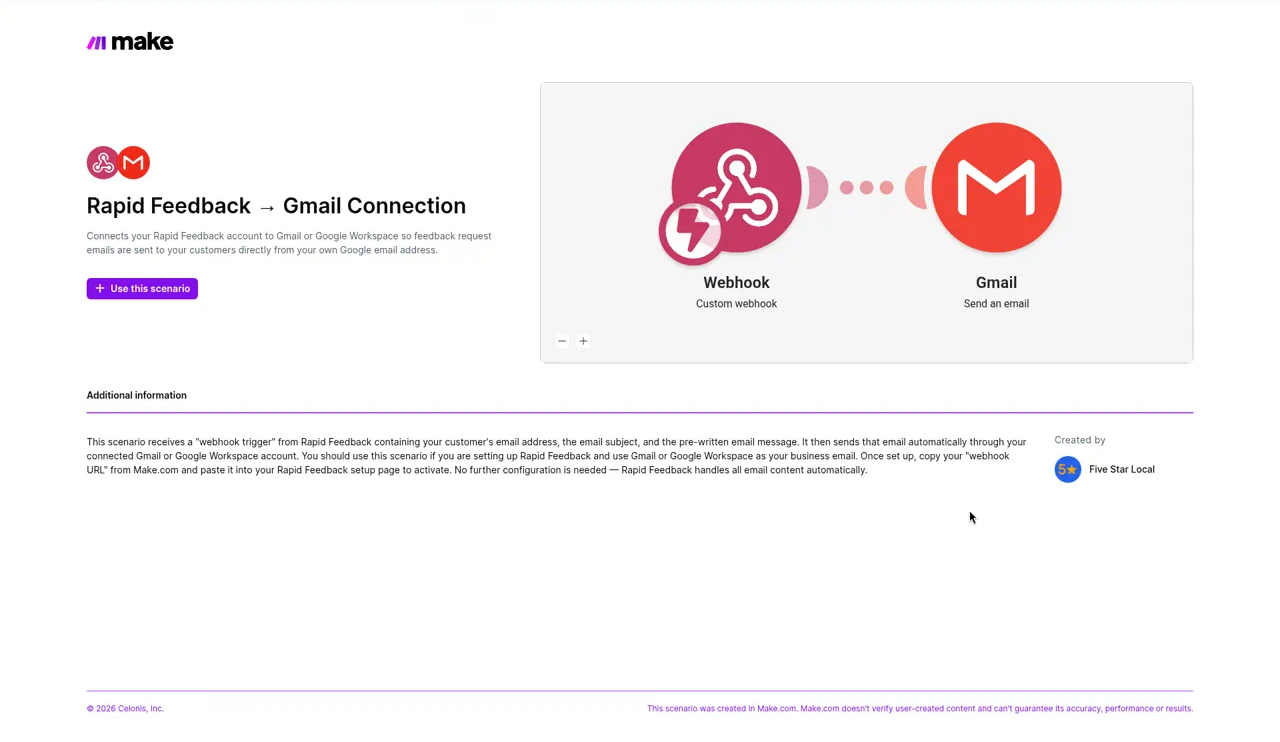
2. Open our Gmail scenario. Open Rapid Feedback → Gmail Connection and click Use this scenario. If Make.com asks about getting started with your first automation, click Dismiss.
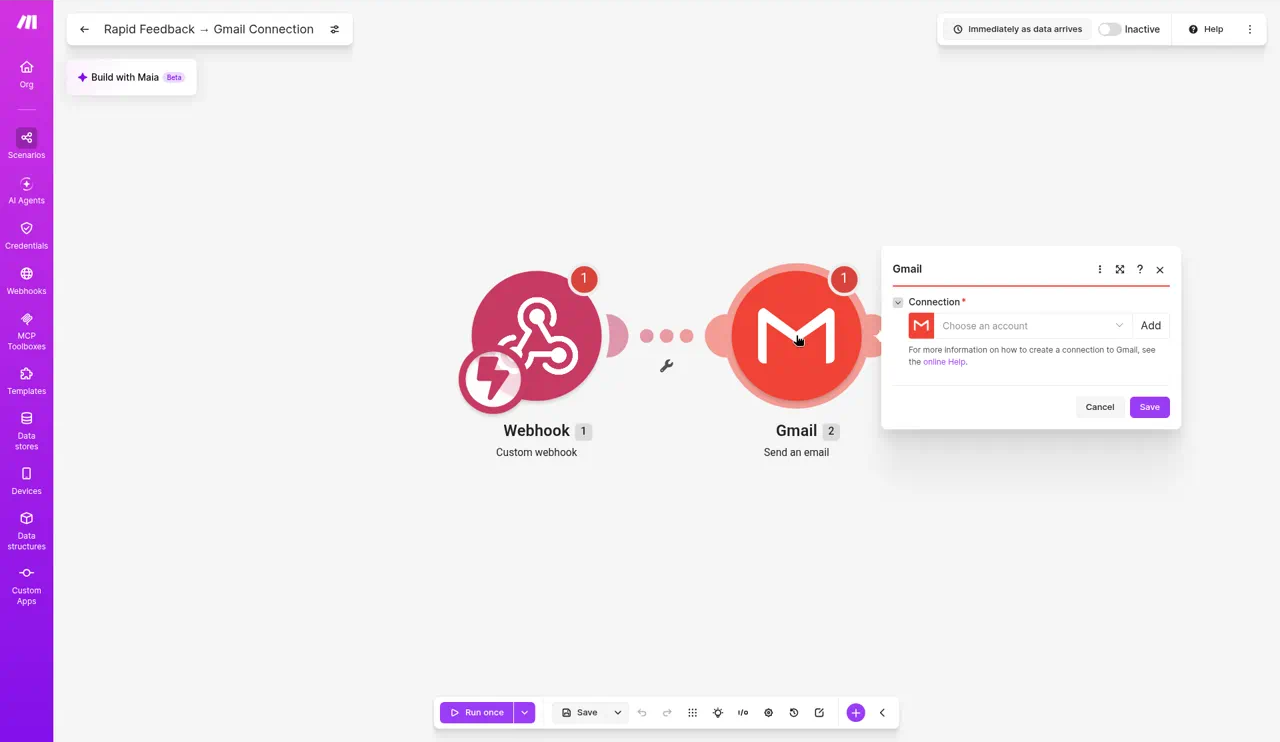
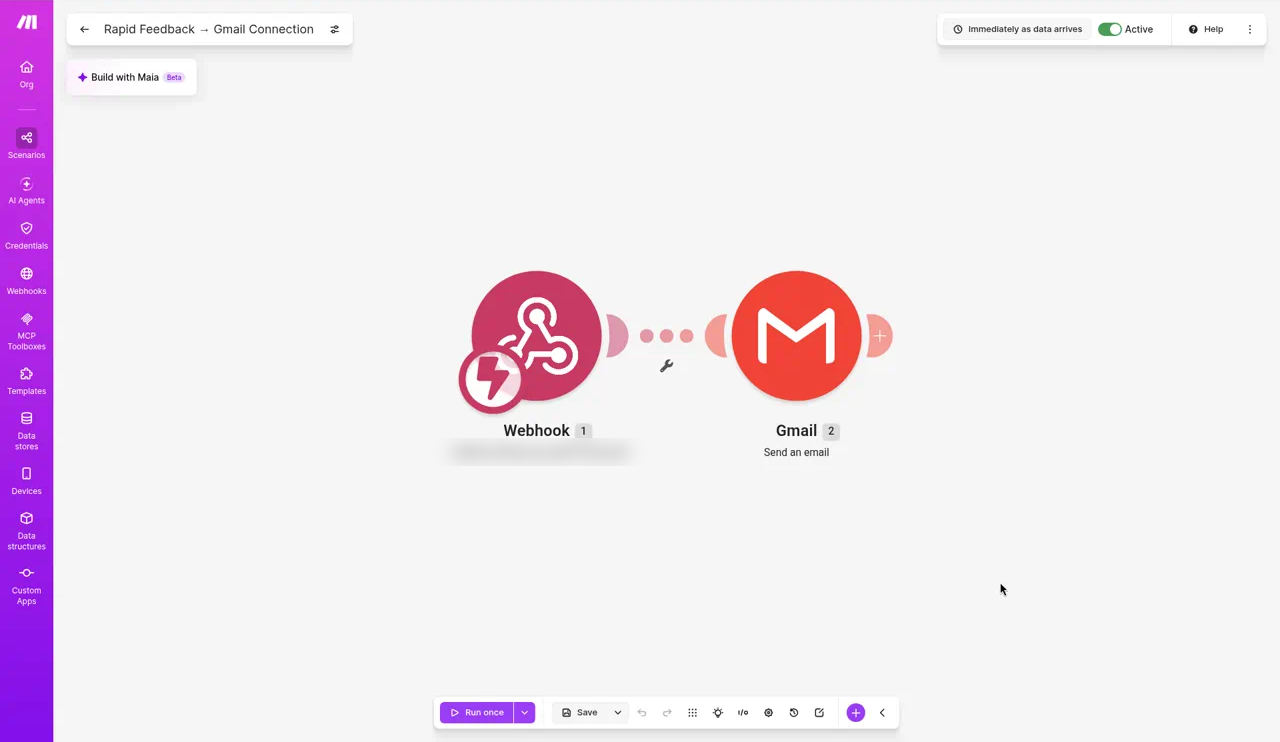
3. Connect your Gmail. Make.com opens the scenario with two bubbles. Click the Gmail bubble (the second one, "Send an email"). Under Connection, click Add (next to Choose an account). Name it the same as the email address you're connecting. Click Sign in with Google and sign in with the inbox your customers already know. Click Continue on each confirmation screen. Then save the Gmail module.
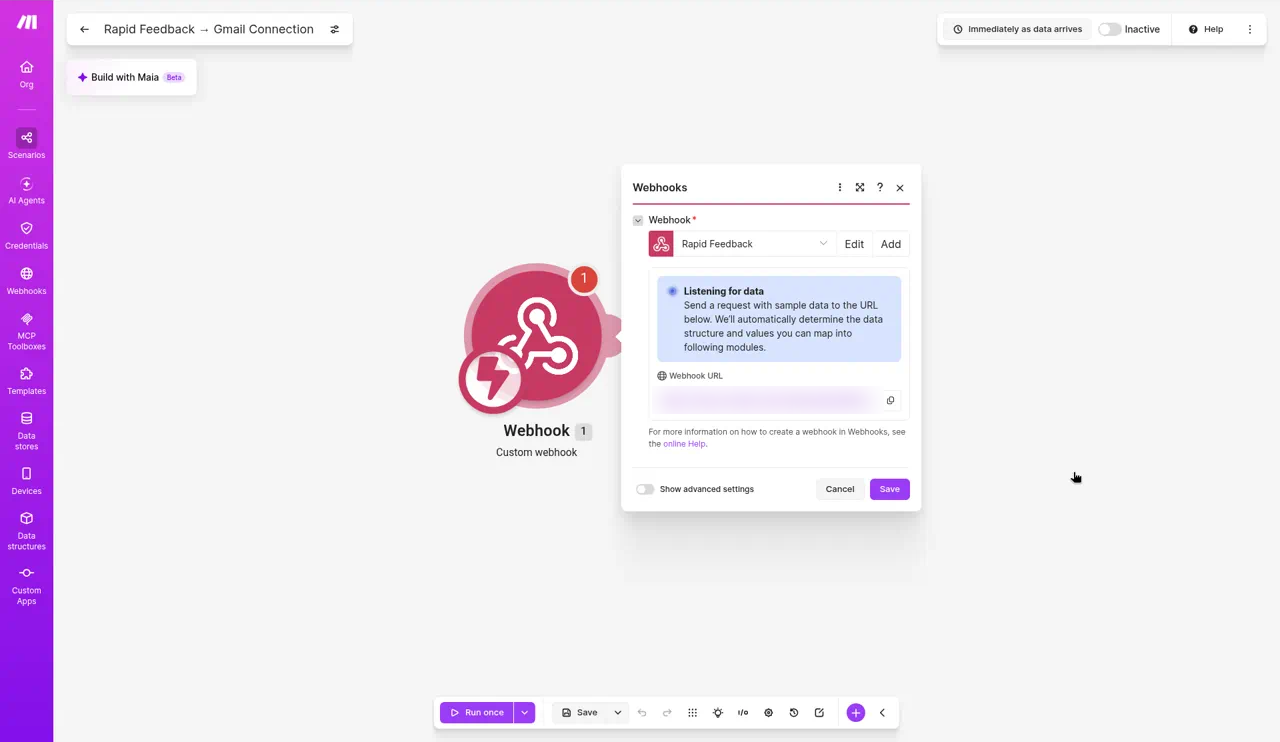
4. Create the webhook and copy its address. Click the first bubble (Webhooks, "Custom webhook"). Click Add (next to the Webhook dropdown), name it Rapid Feedback, and click Save. Back on the webhook screen, click the copy icon next to the webhook address so it's on your clipboard. Click Save again. If a yellow warning says the data structure isn't defined, ignore it; Rapid Feedback already sends the right data.
5. Save and switch on the scenario. Click the disk (Save) icon to save the scenario. Then click the toggle to the left of immediately as data arrives to switch it on.
6. Paste the address into Rapid Feedback. Back in your Rapid Feedback tab, paste into Your Make.com webhook URL and click Continue.
1. Create or sign in to your Make.com account. Go to Make.com and sign up (or sign in). New accounts are asked a few onboarding questions. Choose anything; none of them affect Rapid Feedback. Then confirm your email by clicking the link Make.com sends you.
2. Open our Outlook scenario. Open Rapid Feedback → Outlook Connection and click Use this scenario. If Make.com asks about getting started with your first automation, click Dismiss.
3. Connect your Outlook. Make.com opens the scenario with two bubbles. Click the Microsoft 365 Email (Outlook) bubble (the second one, "Send an Email"). Under Connection, click Add (next to Choose an account). Name it the same as the email address you're connecting. Sign in with your Microsoft account, using the inbox your customers already know. Click Continue on each confirmation screen. Then save the email module.
The picture shows the Gmail module. The Outlook one looks the same.
4. Create the webhook and copy its address. Click the first bubble (Webhooks, "Custom webhook"). Click Add (next to the Webhook dropdown), name it Rapid Feedback, and click Save. Back on the webhook screen, click the copy icon next to the webhook address so it's on your clipboard. Click Save again. If a yellow warning says the data structure isn't defined, ignore it; Rapid Feedback already sends the right data.
5. Save and switch on the scenario. Click the disk (Save) icon to save the scenario. Then click the toggle to the left of immediately as data arrives to switch it on.
6. Paste the address into Rapid Feedback. Back in your Rapid Feedback tab, paste into Your Make.com webhook URL and click Continue.
You're connected
You'll see You're all set! Send your first request to yourself to check everything works.
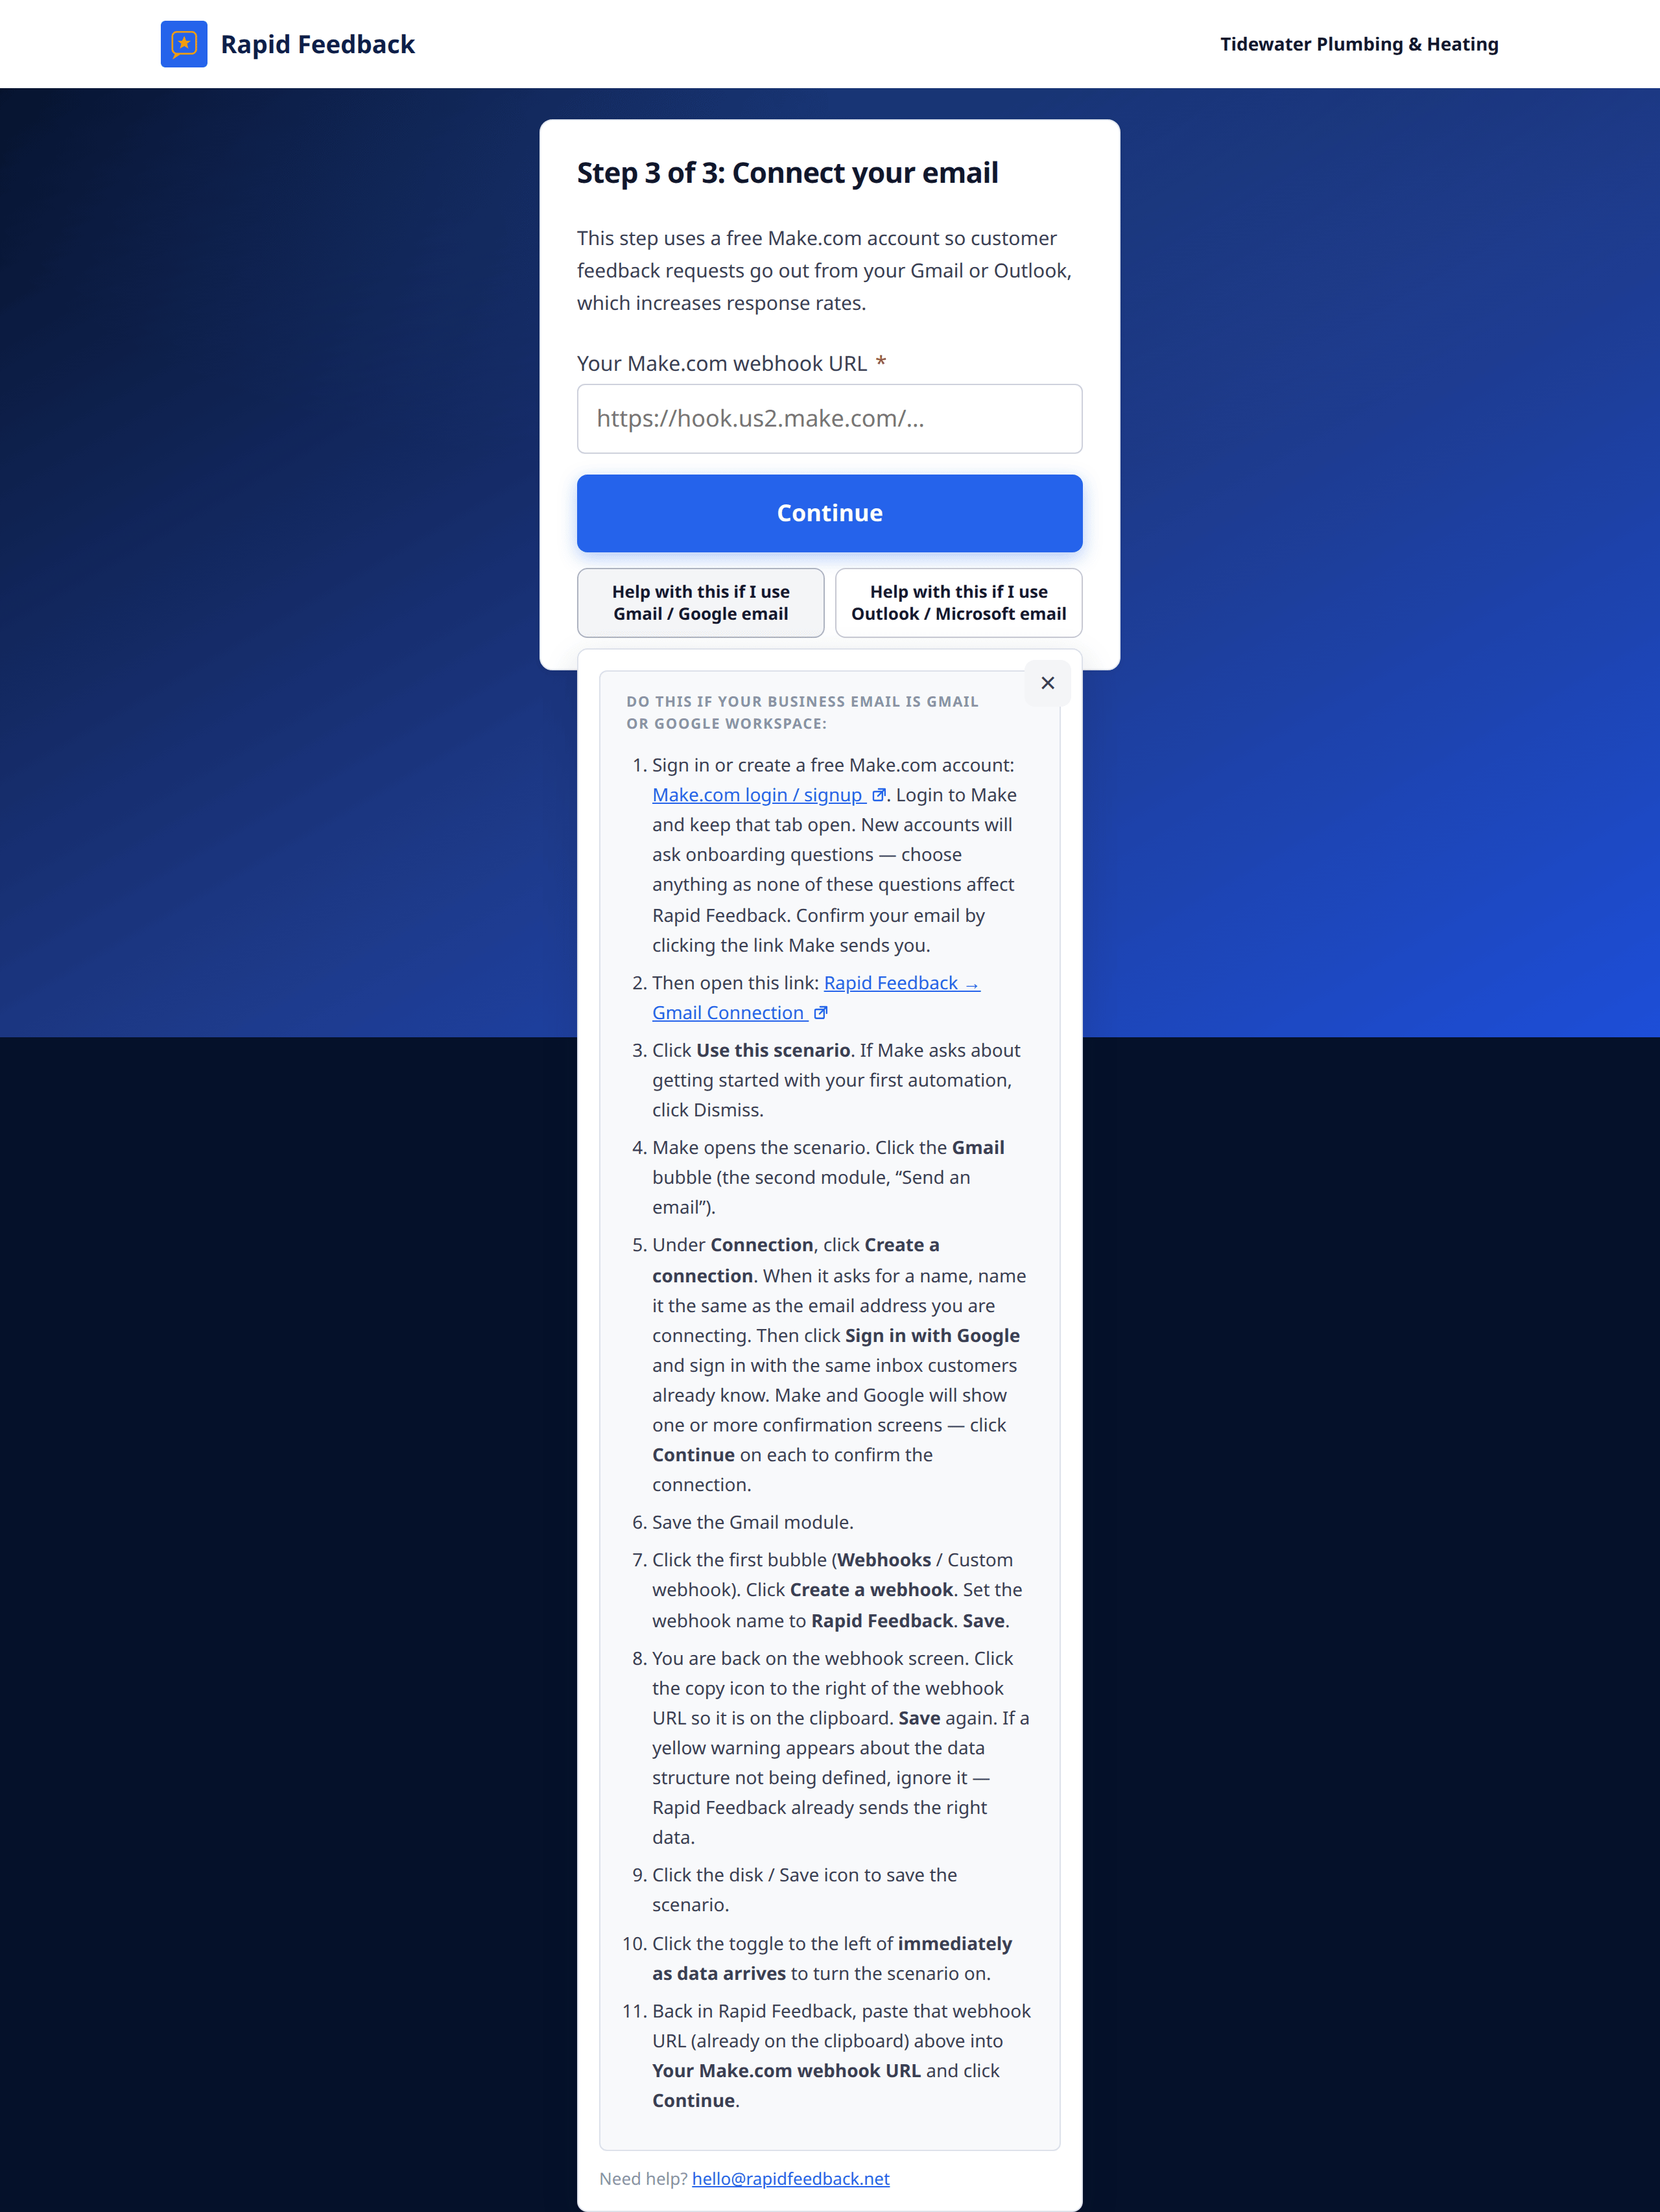
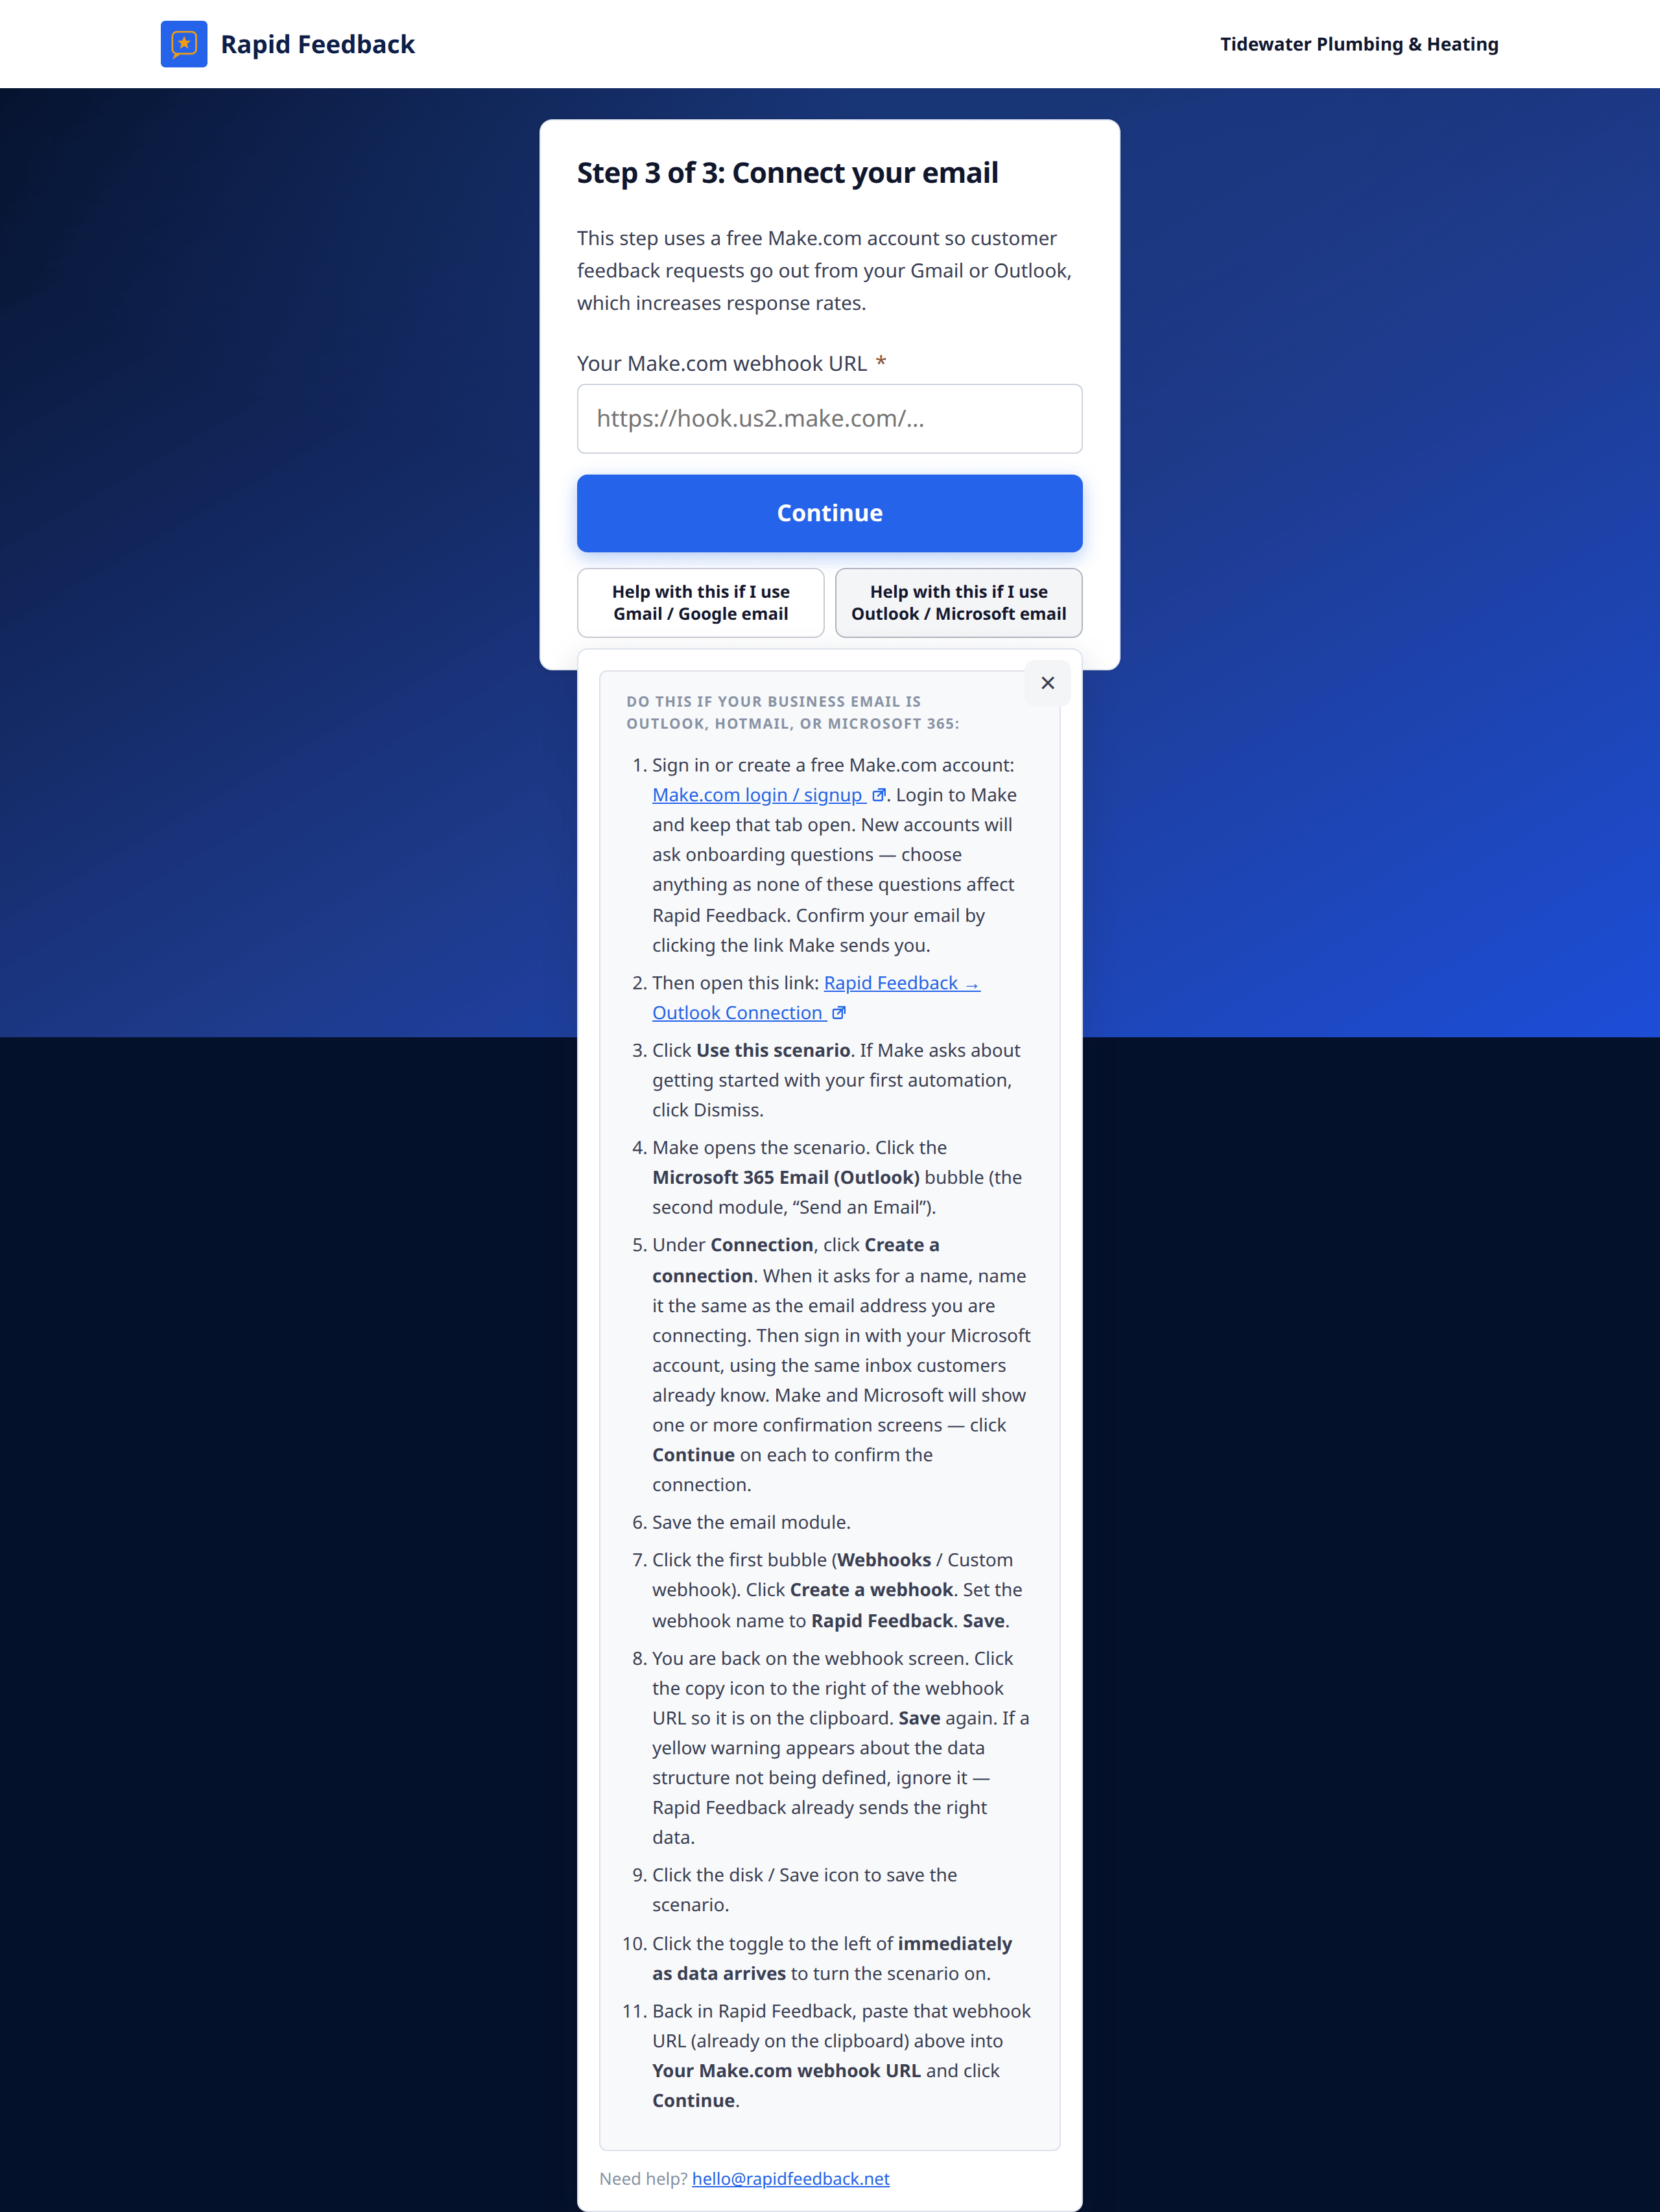
The same steps are on the setup page itself, under Help with this if I use Gmail / Google email and Help with this if I use Outlook / Microsoft email.
Switching to a different email account later
- In Make.com, open your Rapid Feedback scenario.
- Click the email bubble (the second one). Under Connection, click Add and sign in with the new account.
- Save the module and the scenario. The webhook address stays the same, so there's nothing to change in Rapid Feedback.
If you build a brand-new scenario instead, paste its new webhook address in Settings, Links.
Stuck anywhere? See Setup problems, or email hello@rapidfeedback.net.